How to connect to the shared printer
Earlier we have spoken about sharing a printer in the local network at home or office in order to let others use printer from their computer.
Today we are going to talk about how to configure a printer that is available in network to work with your computer.
There are several way for connecting to network printer depending on how it was shared.
First of all you need to locate shared device in the network.
Simply open computer screen and click on network.
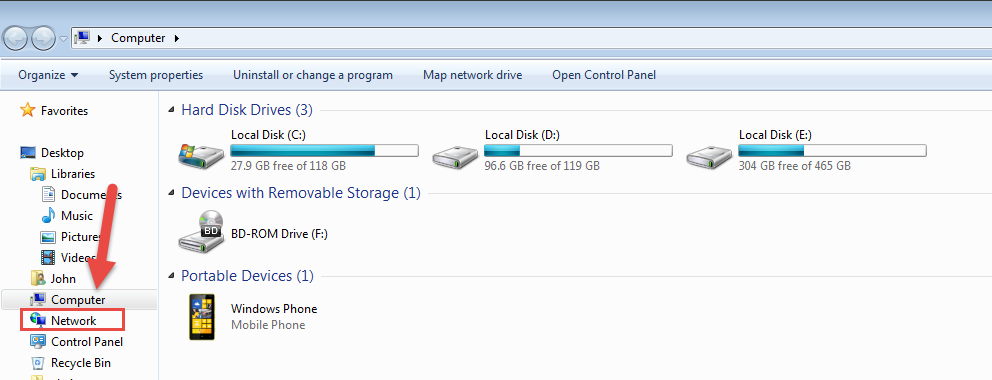
Find a hosting computer on the network and open it. If sharing was set up correctly, there should not be any issue accessing it.
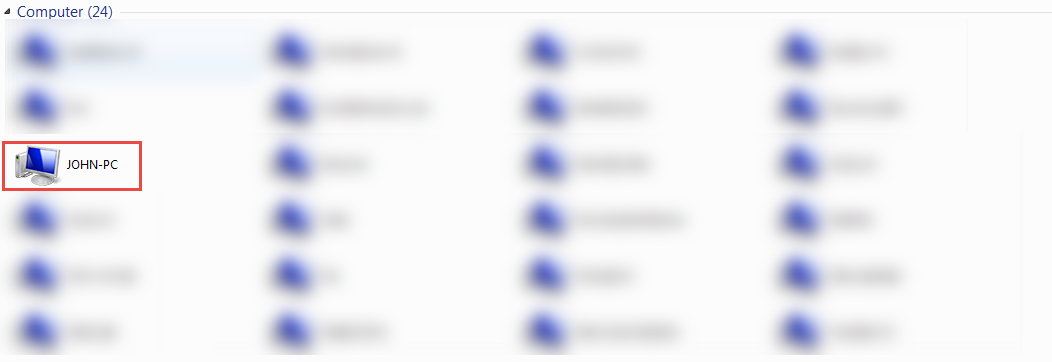
Right click on the shared printer and choose “Connect” option.

Another way is to open device manager and use right click to find option Add printer.
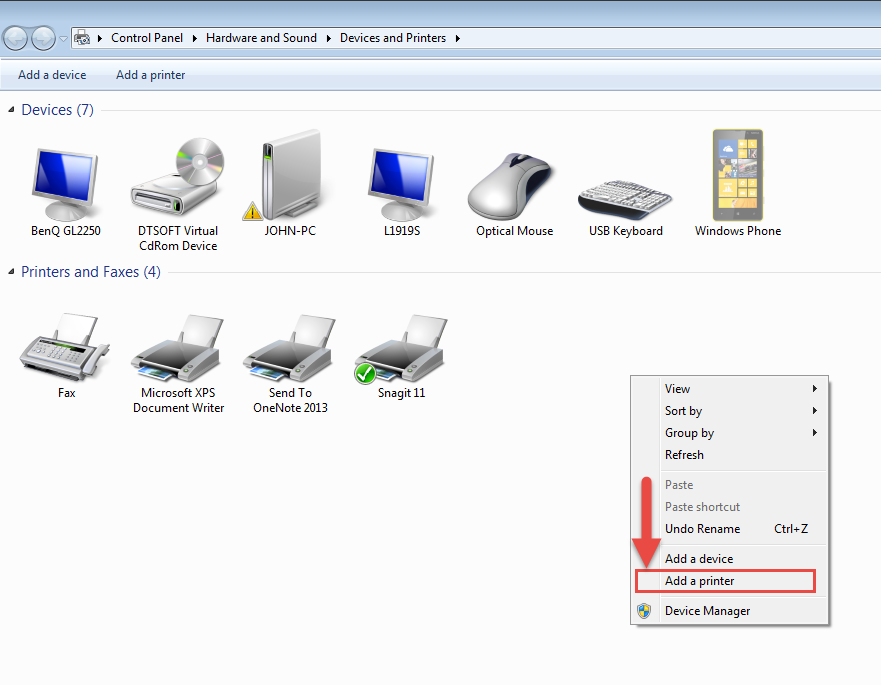
Select Add a network, wireless or Bluetooth printer option on the screen that pops up.

Find the printer in the list of available devices in the network, select it and click next.
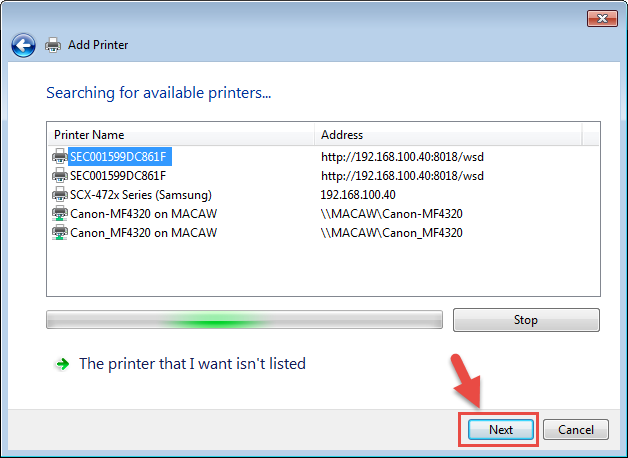
If the printer you looking for is not in the list, click on corresponding option on the screen in order to locate it manually.

In this case you will need to know hosting computer’s network name or IP address and the device name. This can be found on the hosting machine.
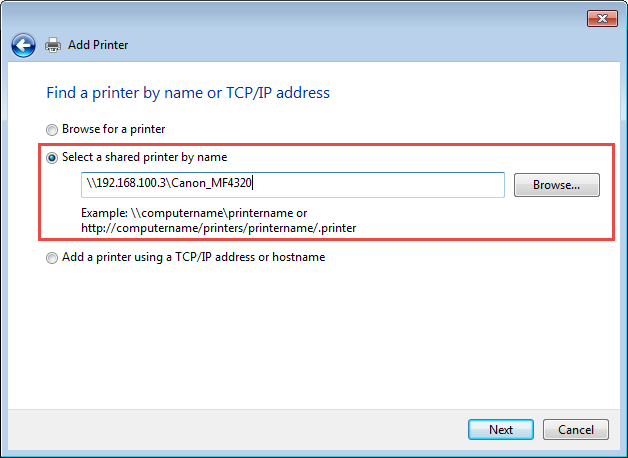
If you have successfully located shared printer proceed with connecting it to your computer. In perfect scenario shared computer will provide you with the drivers. If not, you receive the following error.
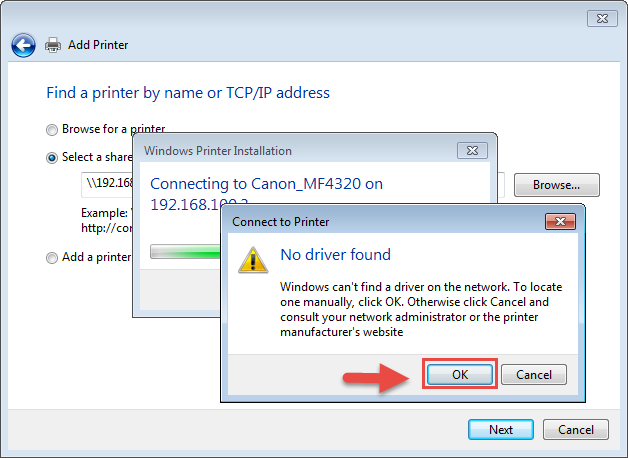
If you are not sure that your computer have proper drivers installed, simply go to manufacturer’s page and get drivers there. After that you can proceed with the next step.
Choose manufacturer and printer model from the list and confirm selection by clicking OK button.
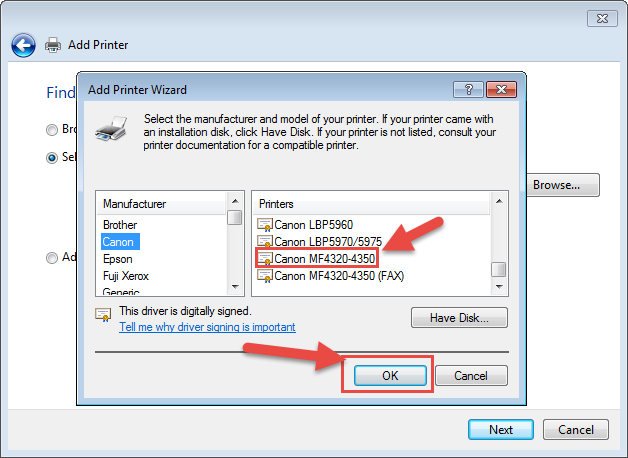
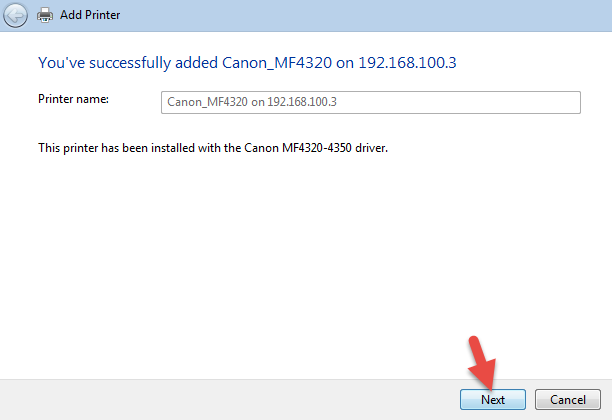
In a few seconds device will be ready to use.
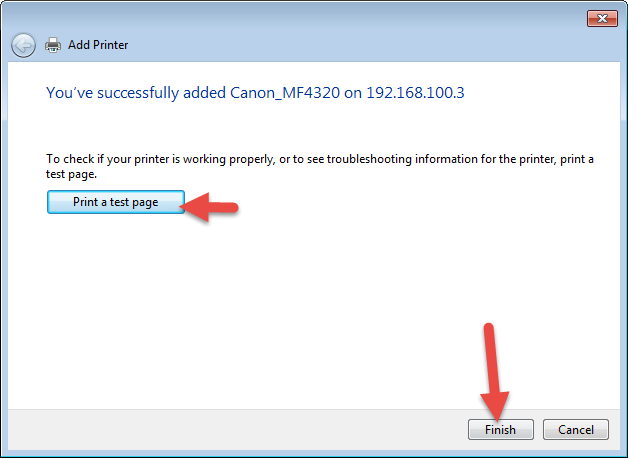
Print a test page to be sure that alignment is good and everything shows up correctly on the paper.
- On February 15, 2016
- 0 Comment

