How to check the connection to a certain port
Windows 10 and Windows 8.1 now have an opportunity to check the connection to a certain port in a remote machine. You may think that a new software is available now and a user needs to go through the installation of third-party applications on a computer. However, your PC may sleep well because Windows uses its own safe utility PowerShell.
Let’s go through the ‘how to’ scenario step by step.
- Open Windows PowerShell using administrator’s rights
- Its own cmdlet, Test-NetConnection, will be used to perform the operation. It has the following script Test-NetConnection -ComputerName COMPUTER_NAME -Port PORT_NUMBER.
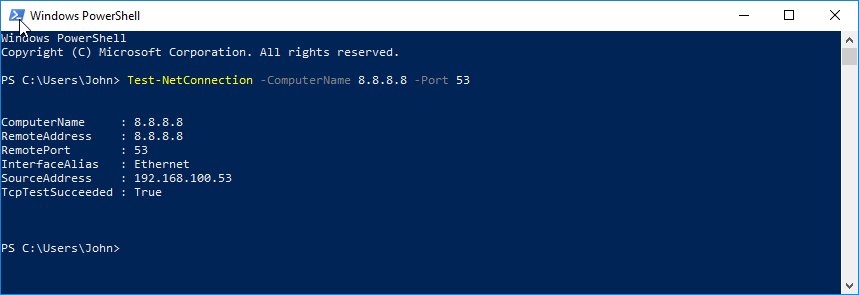
- Replace the COMPUTER_NAME portion with the actual PC name or IP address – you can use the public Google DNS server, which is 8.8.8.8. Also, replace PORT_NUMBER with the number of the port you want to check – let’s say it would be 53
Here is what we get:

- Line with TcpTestSucceeded: True indicates that the connection was successful and the port is open.
- When you try to connect to the port which is closed and does not receive incoming connections, you will see such a situation.

- Line with TcpTestSucceeded: False indicates that the connection was failed but it shows that the server is alive. We can see that PowerShell ping it when looking at ‘PingSucceeded : True’ and ‘PingReplyDetails (RTT): 48 ms’.
Sometimes you may face servers that show the following information TcpTestSucceeded is True but PingSucceeded is False. Such situation happens when Internet Control Message Protocol is not active on the server but the port you have checked is open and receives incoming connections.
So, that is all. Windows PowerShell allows you to check the connection a certain port without installing different third parties. You just need to use its own Test-NetConnection cmdlet.
Keep in touch!
- On September 20, 2018
- 0 Comment


